10.29.2009

jane how-to

There have been some questions about my daughter's Jane (Volturi) costume. Here's how to get the Volturi vampire look that we got here.

I used this Simplicity pattern, view A. I shortened the length of the cloak, made the arm width much skinnier and did not use the frog closure that was suggested - I used a length of fabric so that the cloak could be tied up with a bow.

The contacts are from Wild Eyes and the color/style is Red Hot. We ordered them through our optometrist and got them in my daughters prescription.

We also stopped by Hot Topic and picked up the Volturi Crest necklace.


We finished off the costume with white tights, some Mary Janes picked up inexpensively at Ross and make-up -pale skin, dark eyes.


10.28.2009

the volturi have arrived - new moon jane costume

Any New Moon fans out there? If so, you may recognize this pint sized vampire who is here visiting from Italy.

My daughter decided to be Jane, the Volturi guards silent secret weapon, for Halloween this year. The costume is not quite done but she was off to a Halloween party tonight so she had to wear it as is.

The sleeves aren't hemmed yet - they're just folded up underneath the sleeve, hence the discrepancy in lengths (that will be fixed before Halloween) I also need to clean up some raw edges around the neckline before the big candy coma induced night.
Most of it's done though and both she and I are pleased with the almost finished product. The eye color makes this costume - I was thrilled we got our hands on some contacts in a short amount of time. I called the optometrist on Monday and we had the contacts on Tuesday so she would have them to wear tonight.
She has plans to get multiple uses out of this costume - she wants to wear it to the theater for the midnight release of New Moon and just stare people down while quietly telling them "this may hurt just a little" Check out the trailer here to see Jane, played by Dakota Fanning, say that line - she's an evil little blood sucker.

Hope every one's Halloween party plans are on track and that you are getting your costumes taken care of as well. I always love to see Halloween parties and costumes so send pictures my way of any of your holiday happenings.

no swine flu here

just mono.

Sorry for the lack of posts but we have been hit with mono and those that aren't sick are so busy with Halloween prep we can't think.

Be back soon!

10.23.2009

need a reason to party?

It's mole day! Ya, I hadn't heard of it either but it's an excuse for a party. The only reason I know about this glorious holiday, that is sure to sweep the nation (I hear it has the potential to pass Christmas as the favorite holiday), is because my daughter had to sew a stuffed mole for her chemistry class. Sewing/chemistry?!?!? Don't ask.

The kids had to design the mole after something or someone that would allow them to add mole to the name, for example...

Eskimo/eskimole
Edward Cullen/Edward Molen - this one would have been awesome!

You get the idea. Anyway, here is what my daughter came up with..

Any ideas on who this mole might be? Eternal glory awaits those with the right answer so put your thinking caps on because don't we all want some eternal glory?

I thought her mole came out pretty darn cute, so cute in fact that we may make some more of these magnificent moles for gifts. Anyone have good ideas for things or people with mole names? Perhaps we'll pick the one we like best and send you your own mole. I know it's been your life long dream to own a stuffed mole made by some high school kid - admit it!

10.21.2009

oh la la

How cute are these?  Download them for free over at eat.drink.chic - I love that site!


this wedding makes my heart smile

I saw this wedding on Snippet and Ink today and it made me feel all warm and fuzzy.  I love children's literature so a children's author/illustrator combined with a friend reading a favorite children's book and a perfectly personal wedding made me happy.  Go check it out!  

I know one special elementary school teacher that would love this!

beauty is in the eye of the beholder

Look at this winning piece of brass.  You can say it's ugly - it won't hurt my feelings.  
I picked it up at my favorite store...Goodwill.  Who needs a fancy party decor store when you have Goodwill a few miles away, not to mention 3 other thrift stores in the same area.

Yes, the price says $49.99.  Not sure who priced this beauty at that but they were smoking something.  I could see the swan that this ugly duckling would become but I wouldn't even have paid $50.  Lucky for me it was "half off green tag" day and I picked this up for $25.  I realize some would say that is still steep but remember I saw what it could become and $25 was a steal.
It was a leap of faith though - this thing is really beat up.  The previous owner did some repair work?!?!  I'm not sure what product they used to get this piece to stick on but I have to say it looks like a wad of chewed up gum.  I have steered clear of touching this part of the candelabra - it grosses me out.
I bought a few supplies and set to working miracles on my brassy beauty.  Once can of 99 cent spray paint from Lowes.  I did a jig when I found 99 cent spray paint - the perfect price for Halloween decor since I don't need anything fancy.
$4 battery operated taper candles that flicker.  Let me tell you why I love these particular ones from Big Lots (is Big Lots a national chain?)  Most battery candles like this are a whole unit - candle and candle holder - these are separate so the candle can sit in any taper candle holder you have - like a big, ugly, shiny brass candelabra.
A couple more things about the candles...yes, I needed 14 of them that came to a total of $56. Perhaps a bit pricey but they are safe.  I could have never pulled off this Halloween prop with real candles.  They'll last forever.  Taper candles would have been less but they'd burn down and need to be replaced far more often (and like I already mentioned...unsafe, the fire department would be here shutting down my decorating)  Finally, the cost is less than a real or artificial Christmas tree which people buy every year.  It's no secret that I love Halloween so having a Halloween "tree" makes sense.  ALL my reasons make sense and hopefully my husband thinks so too when he reads this post and sees how much I spent on candles.

Back to the project.  I hit the candelabra with some black spray paint but didn't do full coverage - I just wanted to tone down the gold goodness.  After looking at these pictures I see that I need to hit it with some more paint towards the bottom - I'll get on that today.

I also added the candles, minus one - I need to fix the holder as soon as I can find some chewing gum :)
Then I grabbed one bag of Creepy Cloth, again from Big Lots.  This is the same cloth that I used on my mantle and staircase.
Drape the candelabra with the cloth - ripping , tearing and cutting where necessary.
Add some moss.  This dried moss is the perfect Halloween accessory - it makes any scene look creepy.
The finished candelabra during the day (with a pumpkin thrown in to keep the empty candle spot warm while waiting for the candle)

It's not much to look at - it's better than it was before but the daytime is not when this lady shines...

nighttime baby, that's her glory moment!


I love her!  Her Halloween glow makes me happy.  She reminds me of the candelabras that meet you in the line at Disneyland's Haunted Mansion right before you enter your Doom Buggie.

I have one more thing to add but for the most part this trash to treasure is done.  I am concerned about the empty space at the bottom of the candelabra - it needs something to ground it and make it into more of a scene but I haven't come up with any great ideas - anyone? Anyone?

10.20.2009

where's the beef (netting)


Is anyone even old enough to remember that commercial?

I have moved my decorating efforts outside because lets face it - curb appeal counts (even on Halloween)  I've been working on spider webs.  If you love Halloween than the product I'm about to share is for you - it is one of my favorite Halloween products of all time.

Check out these webs...


Some close ups too...


I still have lots to do to cover the house but I couldn't wait any longer to share these webs.  The product used is beef netting.  I believe it is used to wrap big 'ol cuts of meet - like the hanging kind that you would find in Sam the butcher's shop (man, I love the Brady Bunch)  Now I might be wrong on the beef netting's uses so don't use my answer on Jeopardy but I think I'm right - 80% sure I'm right.

Beef netting is used for lots of commercial haunts like Knott's Halloween Haunt (Knott's Scary Farm, for the locals) I think it's great for commercial haunts as well as home haunts because it has a more graphic bunch then the stringy webbing that comes in a bag that we all buy for a couple bucks.  Now don't think I'm bad mouthing the stringy stuff - it has it's uses - sometimes you need the effect of the thinner webs (but I do have a better option for that too coming in a later post)

But getting back to the beef netting...

You can find the beef netting at Trenton Mills.  It may be available elsewhere but Trenton Mills is where I have purchased mine - they are easy to work with and I have been beyond happy with them.  When I first purchased mine years ago it only came in a 20 lb roll and cost just under $100 with shipping.  That may seem like a crazy amount of money for spider webs but I am still using that same roll 6 years later and probably have a couple more years before I'm out.  When I first bought it I don't think they understood how many people use it for Halloween now they make smaller rolls that cater to the home haunter/Halloween party thrower.

It comes in a big roll.  As you unroll it you see that the beef netting comes as a tube.  You need to cut down the side of the tube to get one flat piece of netting.  Then you tack it up - I use a staple gun when tacking to my house.  Once you have stretched it where you want it (you stretch it a ton because it works better that way) you take a pair of scissors, exacto knife or other sharp object and slice away.  I sometimes stretch it even more after I have cut holes and slits.

The amount of cutting is up to the individual.  I happen to think it looks better with more cuts of varying sizes but some prefer fewer cuts.  Check out this photo gallery on Trenton Mills site to see how others have used the netting.

If you decide to go this route with your webs I'd love to see your results so send pictures my way.

10.19.2009

carry out your theme

I love entertaining at Halloween!  You can go all out with some great spooky themes.  Why not carry out your haunted theme with a Halloween inspired answering machine message?

Every year at this time we switch out our regular boring message with this message delivered in a witch voice...

double double boil and bubble
I'm not home so what's the trouble
eye of newt and toe of frog
wool of bat and tongue of dog
I'm not home, leave me alone 
and leave a message at the tone
(cackling witch laugh and scream in place of the beep)

You can find the message we use, as well as others here.

If you are throwing a Halloween bash imagine how fun it would be for guests to hear this message when they rsvp. Small, simple details like this make the whole party experience more fun as it builds anticipation for your event

spooky stairs

Although the house is still not completely decorated for Halloween there are a few more areas of the house that are taking on the holiday spirit.

Here is our banister...
I used essentially the same elements that I used on my mantle but with a couple additions.  I added a garland of black silk leaves.  I believe I found it at Michael's or Big Lots - where I purchase most of my decorating supplies (as well as Thrift stores and garage sales)  Decorating does not have to be expensive.

I also added extremely cheap black garland that already had orange lights running through it.  I want to say I paid like 3 or 4 dollars for the stuff and it is the super cheesy garland - black, shiny and puffy but it works because I layer it with so many other elements.  It adds bulk to the garland that in turn makes the garland look substantial AND expensive.  I have gotten lots of compliments on the garland and questions like where I bought it - if I bought it as is it would be expensive but layering all the inexpensive elements gives me the look of spending money on decor at a fraction of the cost.

It is hard to photograph all the black so lots of the garland is lost but hopefully you get some idea.
Excuse the knight that is hiding in the picture - he has not been prepped yet for the holiday. He just got taken from his Halloween box with no where to go yet.

The urns are plastic and were discounted a few years back after the holiday.  I added some black flocked twigs and leaves and threw some pumpkins on top.  
The effect at night with the glow of the lights and jack-a-lanterns is awesome.  I love to have my house all aglow with Halloween spirit.

10.16.2009

the king of all candied apples

Um, hello...these are gorgeous, haunting an I'm sure tasty.  I love these candied apples from Matt Bites.

I love candied/carmel apples for parties and now with these beauties candied apples can feel right at home at the most sophisticated Halloween soiree.  

One of the best new food ideas I've seen!

i'm on lolliblog

Lolliblog has had some great posts as of late for a Haute Hallowedding.  Today's post and inspiration board featured photos from our 2007 Halloween bash that was a haunted victorian mansion theme.

Do you see my Gourley Manor place settings, antique silverware (do you love the shape of that fork?) and cookie take home favors for the party guests?  You can see more pictures from our party here.

Be sure to head on over to Lolliblog to see where the rest of the above inspiration comes from.

10.15.2009

candy corn that bill cosby can sink his teeth into

I am so making this for the baby shower I'm hosting in a couple weeks - cute and simple, gotta love it.  Directions for this tasty pudding treat can be found at Life is a Banquet.

boo brownies

Too cute and would be perfect for my sons Monster Mash birthday party tomorrow.  Directions here.

invite: lil' pumpkin

This stack of papers...
became this...
A friend and I are hosting a Halloween themed baby shower for another friend of ours (yes, she loves Halloween as much as I do).  The color scheme is traditional black and orange with a bit of blue thrown into the mix since the new arrival will be a boy.

Speaking of boy, this little detail is my favorite on the invite.  
After designing the invites I realized that the little strip of blue paper might not be enough info for guests to know that Kendall is having a boy so I added this little tag.  I love it!

Although these are for a baby shower they would work equally as well for any Halloween bash you may be throwing.  Want to recreate this invite?  Here's what I used...

striped black and cream paper:  My Mind's Eye, The Spider Web "Toil and Trouble"

blue paper:  Bazzill  

orange paper:  Bazzill

"oh boy" tag:  my design, black box with lettering in white, printed on cardstock

main font:  century gothic 

"baby shower" and "boy" font:  Ithornet

I put it all together with my trusty Xyron - the crafting tool that I can't live without.  Sure you can use double sided tape but why would you when you can use the Xyron.  If you don't have one Christmas is coming up - you may want to ask Santa.

Be sure to click on all of the above links for more info and stayed tuned for pictures of the shower in a couple weeks.

10.13.2009

i heart iDIY

I believe I have said it before on this blog but I am saying it again I love the 'I Do'-it-Yourself Wedding blog!  I always find the greatest things there.

Lookie at what I just found there...

The last bag is my favorite.  I am heading out as soon as I finish this post to grab some small muslin bags so I can do this great diy project.  You can visit iDIY to get more info and links or go to Love. Obsess. Inspire where you can get this free printable goodie created by Oscar+Emma Designs

the goblins were hung by the chimney with care

Have you ever thought about the serious lack of Halloween carols?  I have, because that's how my brain works - spending inappropriate amounts of time thinking about nonsense things.  

But anyway...

I have had to decorate here a little there a little because of my busy October schedule.  Here are a few pictures of my fireplace mantle (I'll follow up in the next day or two with other Halloween hot spots in my home as I get them all done)

The pictures don't provide a ton of detail but you can get the idea.  The decor is rather simple. Here's what I used...

black cheesecloth - dye your own or buy it.  It is often referred to as spooky cloth when you buy it packaged at the store.  I have found mine at Michael's and Big Lots.  I am sure any craft store will have it.  Take some scissors to it and shred that baby up.  I used tape to keep mine situated on the mantle.

black twig-like garland - I tried to find a picture of the stuff online but no such luck.  This is garland that I found at Michael's that looks like thin black twigs with a little touch of purple glitter.

black Christmas garland - yes, I said Christmas.  This garland is from Michael's as well and it looks exactly like the super inexpensive green Christmas garland they sell it's just black instead of green.

a strand of flicker lights - I have a abnormal fascination with flicker lights in case you wanted to know some of my issues :)

Once that is all set up go to town with your creativity and with all the junk lying around your house.  What?  You don't have junk?  I can't be the only pack rack.  Look around your house and see what you've got.  
I used this glass pedestal bowl that normally holds our initials in it.  I threw some skulls in it and it works for Halloween
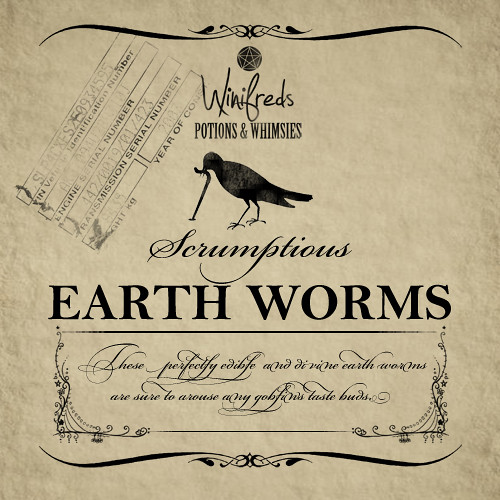
I added some candlesticks and lots of bottles.  The bottles are the easy part.  Spice bottles, salsa bottles, oil bottles, etc - do NOT throw them away.  I hold on to mine, add random things to them and slap a label on them to give them a creepy Halloween vibe.  you can always pick up great bottles at Goodwill and garage sales.

The labels aren't too hard to make on a computer especially if you keep them simple.  The ones I have made are a simple box outline with the ingredient written in a cool font.  To find a font that is right for you try Dafont or Font Space (both are font sites that I love and use frequently)

If you aren't feeling especially crafty and don't want to take the time to make your own labels then you must go here right now.  Seriously, go right now!  Johnny over at love Manor has created the most amazing labels - perfect for your Halloween decor AND they are free for you to download and use.
Amazing, right?  There are a ton more so if you still haven't gone here go there now.

Do you decorate your mantle for Halloween or are you a Christmas only kind of person?  I'd love to see your Halloween decor - leave a comment with a link to your Halloween hauntings

10.12.2009

calling all so cal readers

You have to get in on this great promotion...
Ashlee is a photographer my family met during a photo shoot.  She took some great shots of our kiddos and we loved her fun personality.  Well, Ashlee is heading to Southern California (LA, San Diego, OC) this month and is offering a great deal on a photo session...no travel fees (she is coming from Utah), 30% off her regular session price and you get the images on a disc. 

If you are interested in seeing Ashlee's work head on over to her site and see how talented she is.  If you book a photo session with her please let her know Denise sent you.

Can't wait to see you Ashlee for my own families photo shoot!

10.06.2009

seriously sick but tasty

Gross, huh?  But I love it and so will my son and his friends when I serve these slimy worm sandwiches at his birthday party next week.

I found these (& other tasty Halloween treats) over at Our Best Bite - a site I had never seen before but now I'm thrilled I found it.  Go one over and check out some of the recipes - you'll be glad you did.  Although I'm not sure much can top this appetizing worm sandwich!

finally some fall weather

The weather is finally cooling here in Southern California and it is time for some simple Fall traditions.  One of my favorites...being bundled up in front of a crackling fire drinking hot chocolate.

Here is a great Halloween twist on my toasty tradition (as well as a great end of party send off for your guests). How about serving up some blood red hot chocolate with marshmallow bones found at Martha.